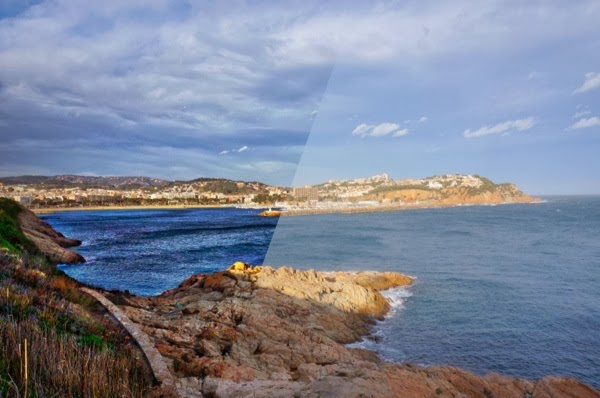
There are a number of in camera affects as I can apply to photographs I take with my Sony NEX-6 including effects that give me a wider dynamic range. The one effect is a HDR which merges three separate shots into one single image on camera and there is another one which is a dynamic range optimiser. Although these in camera effects are quite okay and possibly useful, it is not as good as doing the job on the computer properly with the proper software. That is the case either using an application like Photomatix Pro to get the really good, high quality HDR and when you have used the camera to take the bracketed shots necessary for this type of image, or if you want you can use an application like Intensify Pro.
With Intensify Pro you get a huge range of settings that you can make which will affect your final image. You can even use layers so that you can combine different settings into different parts of your image. As you can see from the video it is possible to use masking to paint an effect on in just certain places, or to use the eraser tool and to take the effects away from certain parts of the image too. There is even a gradient tool for the mask which can be set at any angle to get even finer control over the change from one affected area in the photograph to the effect that you choose for elsewhere in the image.
Hugin for Panoramas
Starting off with the presets in Intensify Pro
You can move the sliders on the settings to go from a subtle effect to something that might just destroy your photo. Part of the fun of post-processing photos Then you have all the combinations that can be set with things like the saturation, exposure and settings which you can use to bring out the texture within an image. You have an infinite number of possibilities when combining all of these and the application gives you a certain number of combinations which are presets. It can be very handy to take one of the presets and to make your own personal changes to the settings and then to save that as your own new preset.
There is a collection of presets that are going to give you black-and-white photographs, monochrome images, some of which are more suitable for landscapes and some are best used with portraits. In Intensify Pro photo processor it is quite handy to take one of these black and white presets and to then use the eraser and to bring back in the colour in just one area of the image. It is even possible for you to take one of these and to move the slider on the saturation setting back up, so that you once again have colour over the whole of the image. You might do that for instance, if you particularly like the overall settings of the preset but would prefer to have some colour.
Just like HDR - Well nearly!
There are two presets within the application that give you HDR like effects. One of them is a softer effect and the other is more vivid. These presets do give you images that are quite like what you might get from some of the settings within Photomatix Pro and could be handy to use if you only have one image to play with rather than a bracketed set. Mind you it is also possible to do a HDR photo with just one image within Photomatix Pro, if you need to. While the photos that you get from Intensify Pro are bright and bold and have a resemblance to the HDR tone mapping, they are not quite the full HDR. Even so, they are quite interesting.

An Easy Application to Work with
There is an icon that you can press so that you can see a before and after, or if you prefer you can go for a view which gives you the before and the after side-by-side. When you are working with the masks sometimes it can be easier if you can see the actual mask and with Intensify Pro you can switch the mask on. It shows up as a nearly opaque red layer over the top of your image.
I use the application from Apple called Aperture to deal with all of my photographs. It is much better than using iPhoto when you are working with a lot of photos. Aperture is also better in terms of the control you have of the effects within it and also for general organisation of your photos too. For these reasons I find it a good idea that I can use intensify pro as a plug-in from within Aperture.
When I have made all of the changes that I want from within the plug-in, I only have to click on Save and I am back in my photo management application. Aperture automatically makes a new version of the photograph that you are working with, so that you can work in a nondestructive way. You can go back to the original at any time and sometimes if you get carried away adding presets and completely messing up your photograph, that can be a good idea.

